I had done some experiments with their SSML, expressive SSML, and Voice Transformation SSML in 2017. It was an interesting way to change, almost like coding the voice in order to make it more human-like. Went back to IBM Watch Text to Speech demo today: https://www.ibm.com/demos/live/tts-demo/self-service/home, and found out it works differently now.
“Hurry up! Pick up the sword and defend yourself, your arrival has awakened the spores. It’s not a good thing.”
IBM Watson – LisaNatural Reader – FreeTTSReaderwideo – English (US) – Mike StevensGoogle Text-to-Speech – English (United States)/WaveNet/en-US-Wavenet-D/Headphones or earbudstypecast – Vanessa/Normal-A typecast – Keybo/fast
“Greetings, my name is Luke, the voice that you’re hearing right now is not my real voice. It is a result of my telepathic thoughts being synthesized by your auditory cortex. It could take form of any voices you have heard before.”
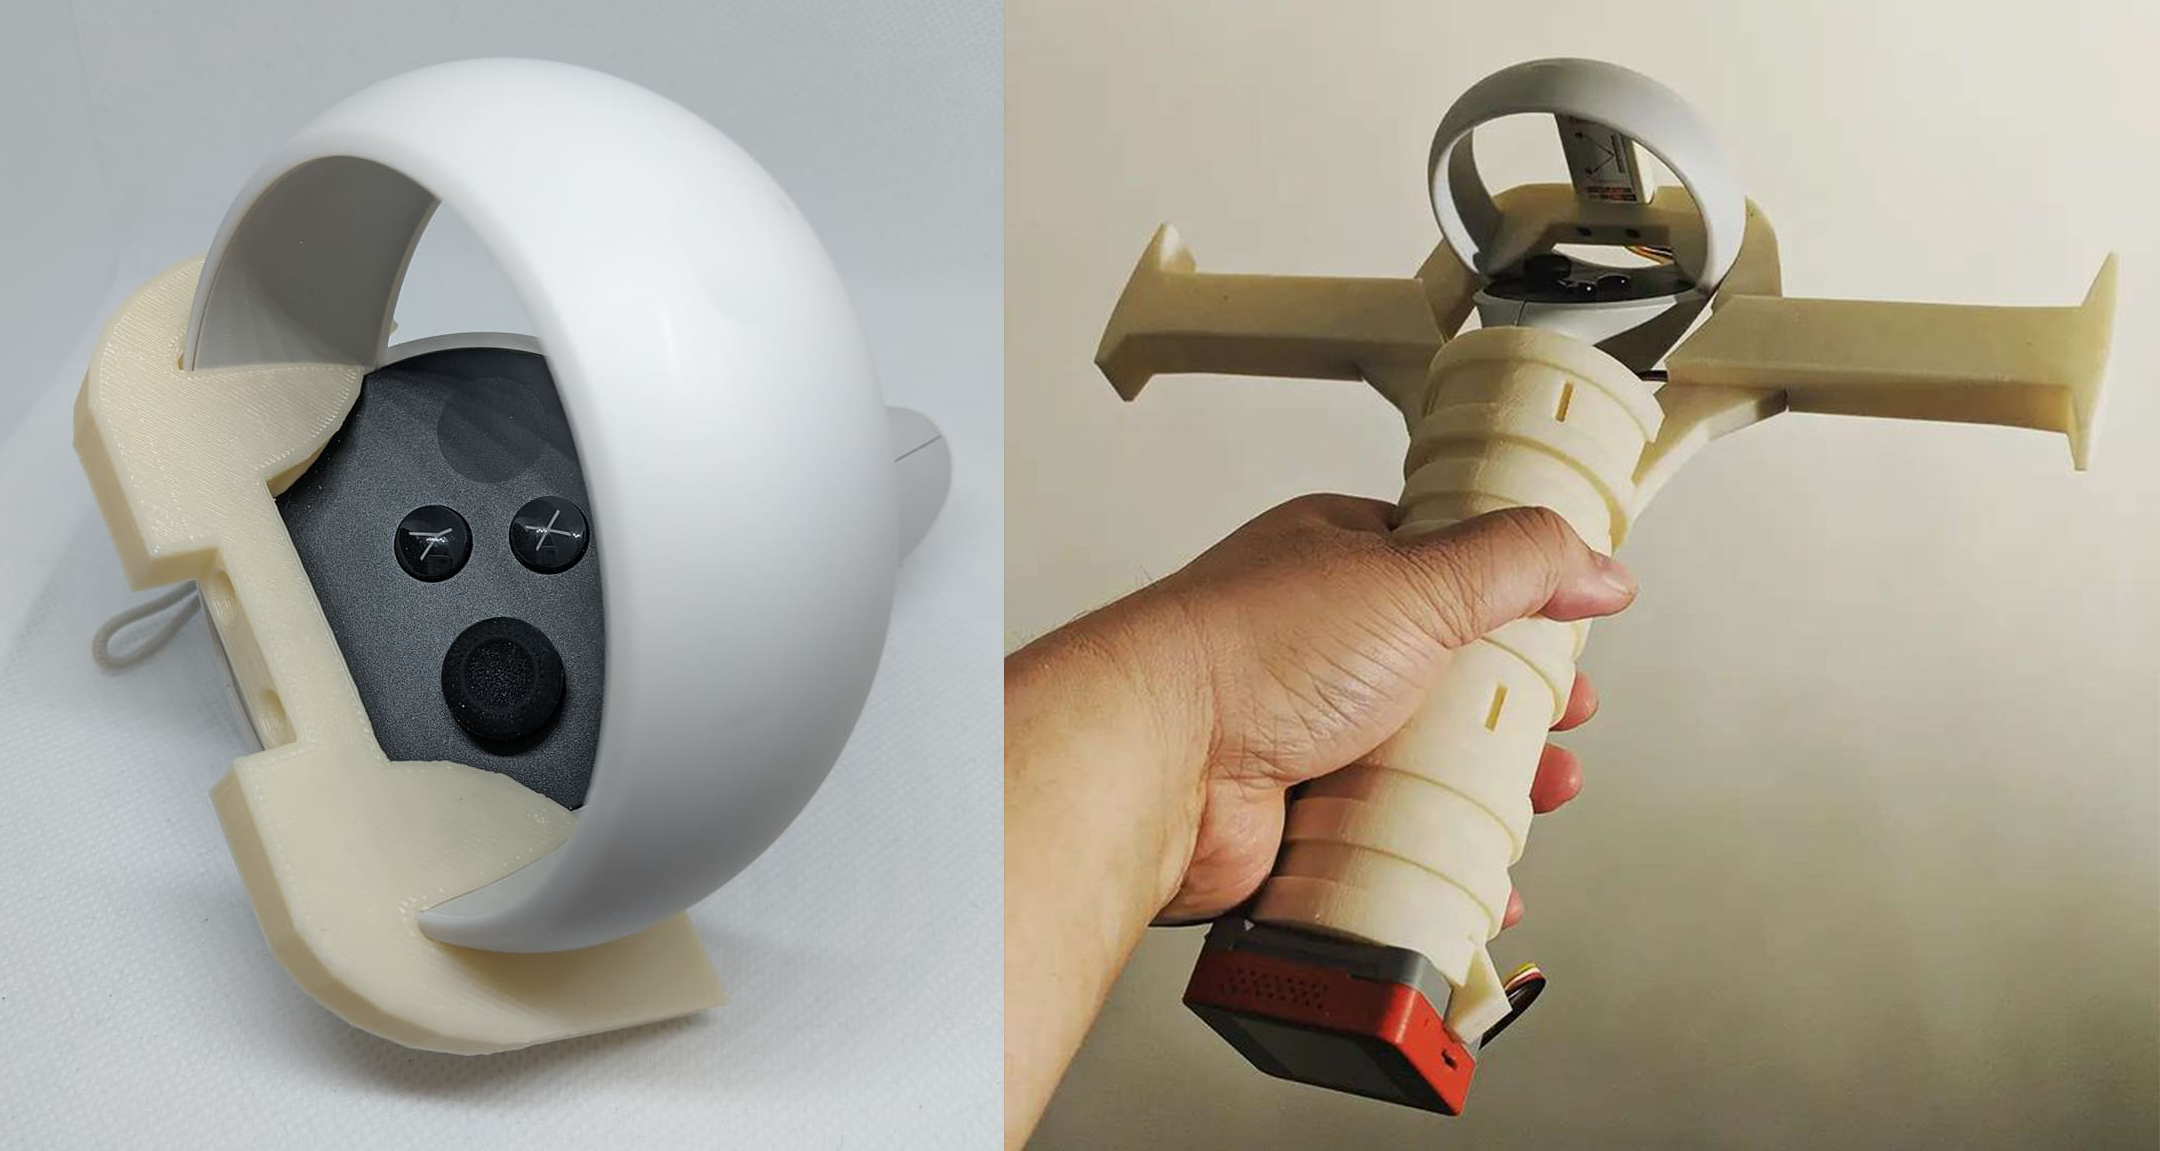
Tokusatsu nerds of my generation probably all mesmerized by Space Sheriff Gavan (宇宙刑事ギャバン)’s Laser Blade when the show aired in 1982, especially when he powers it up before attack. The latest Laser Blade toy by Tamashii Lab was able to bring the powering up experience to live. How do I bring this experience into VR in an embodied way? How does a real-life artifact come to live in the virtual world? This is my attempt. Here are some other inspirations that I would like to incorporate in this experiment:
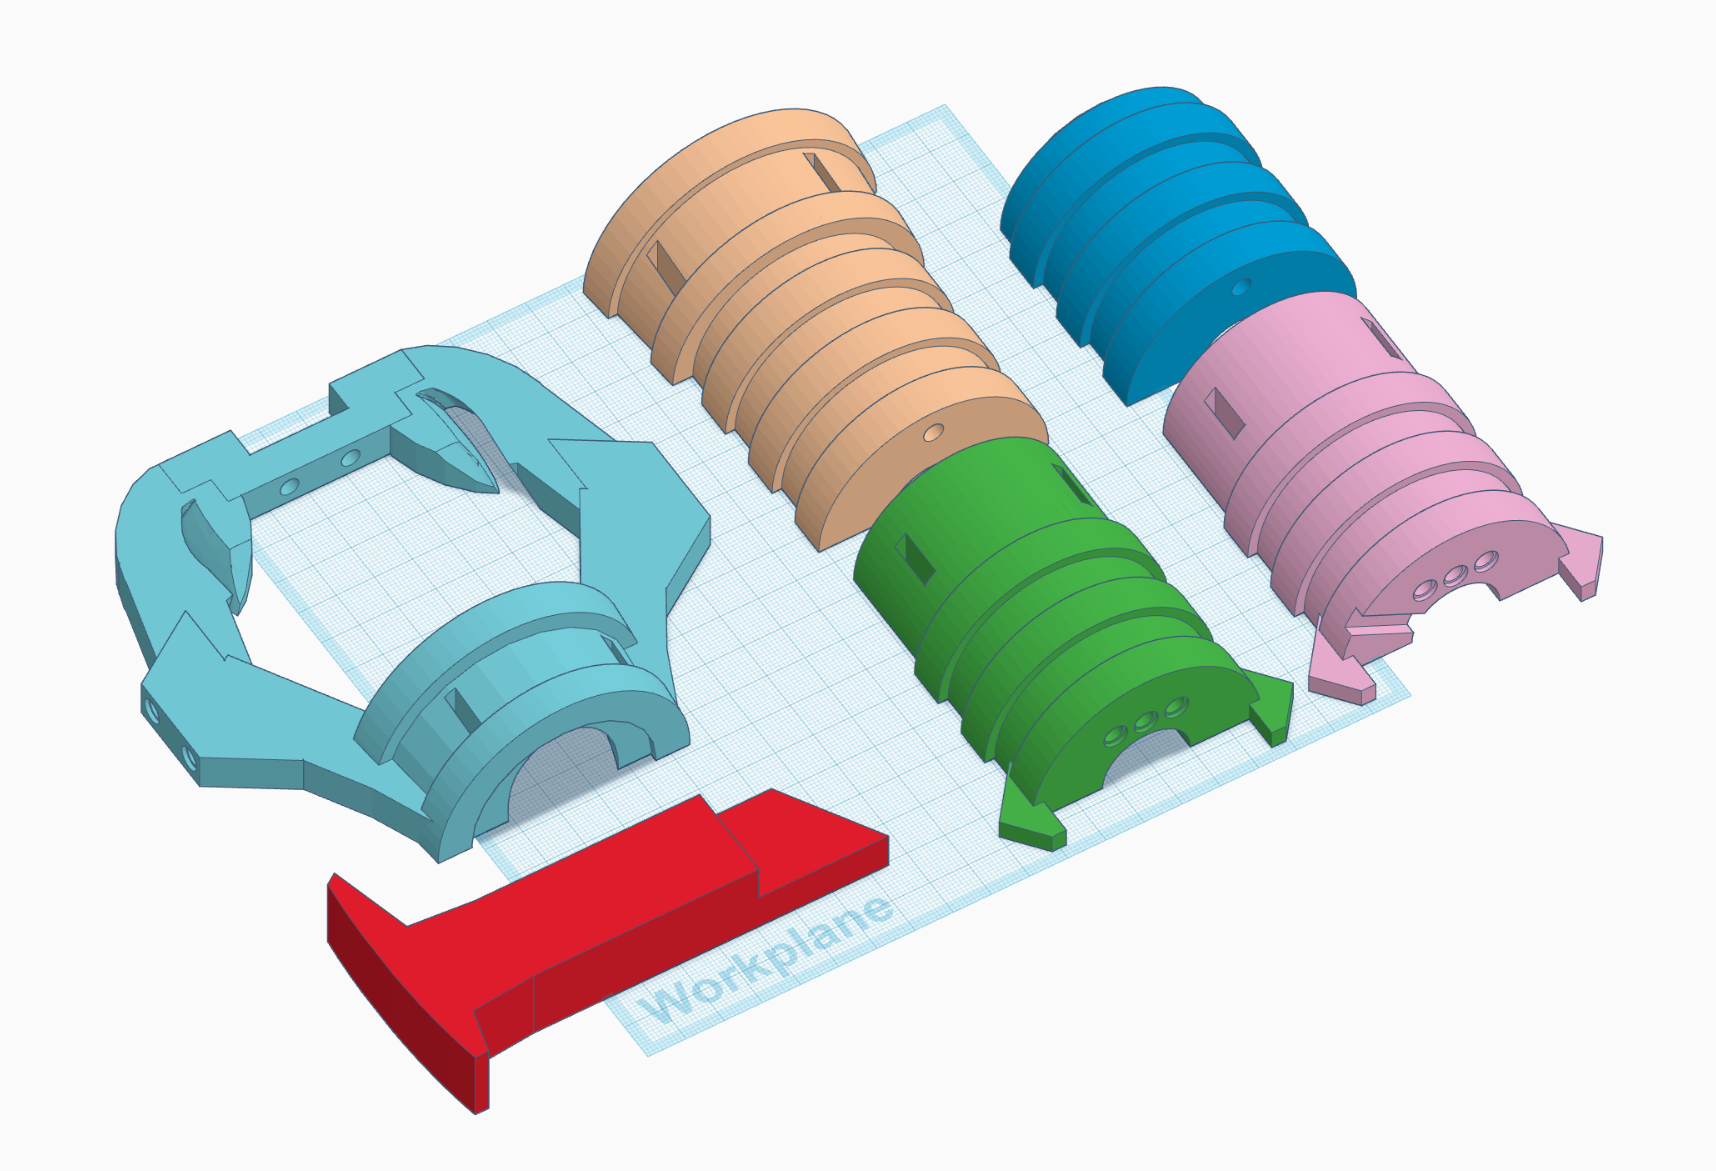
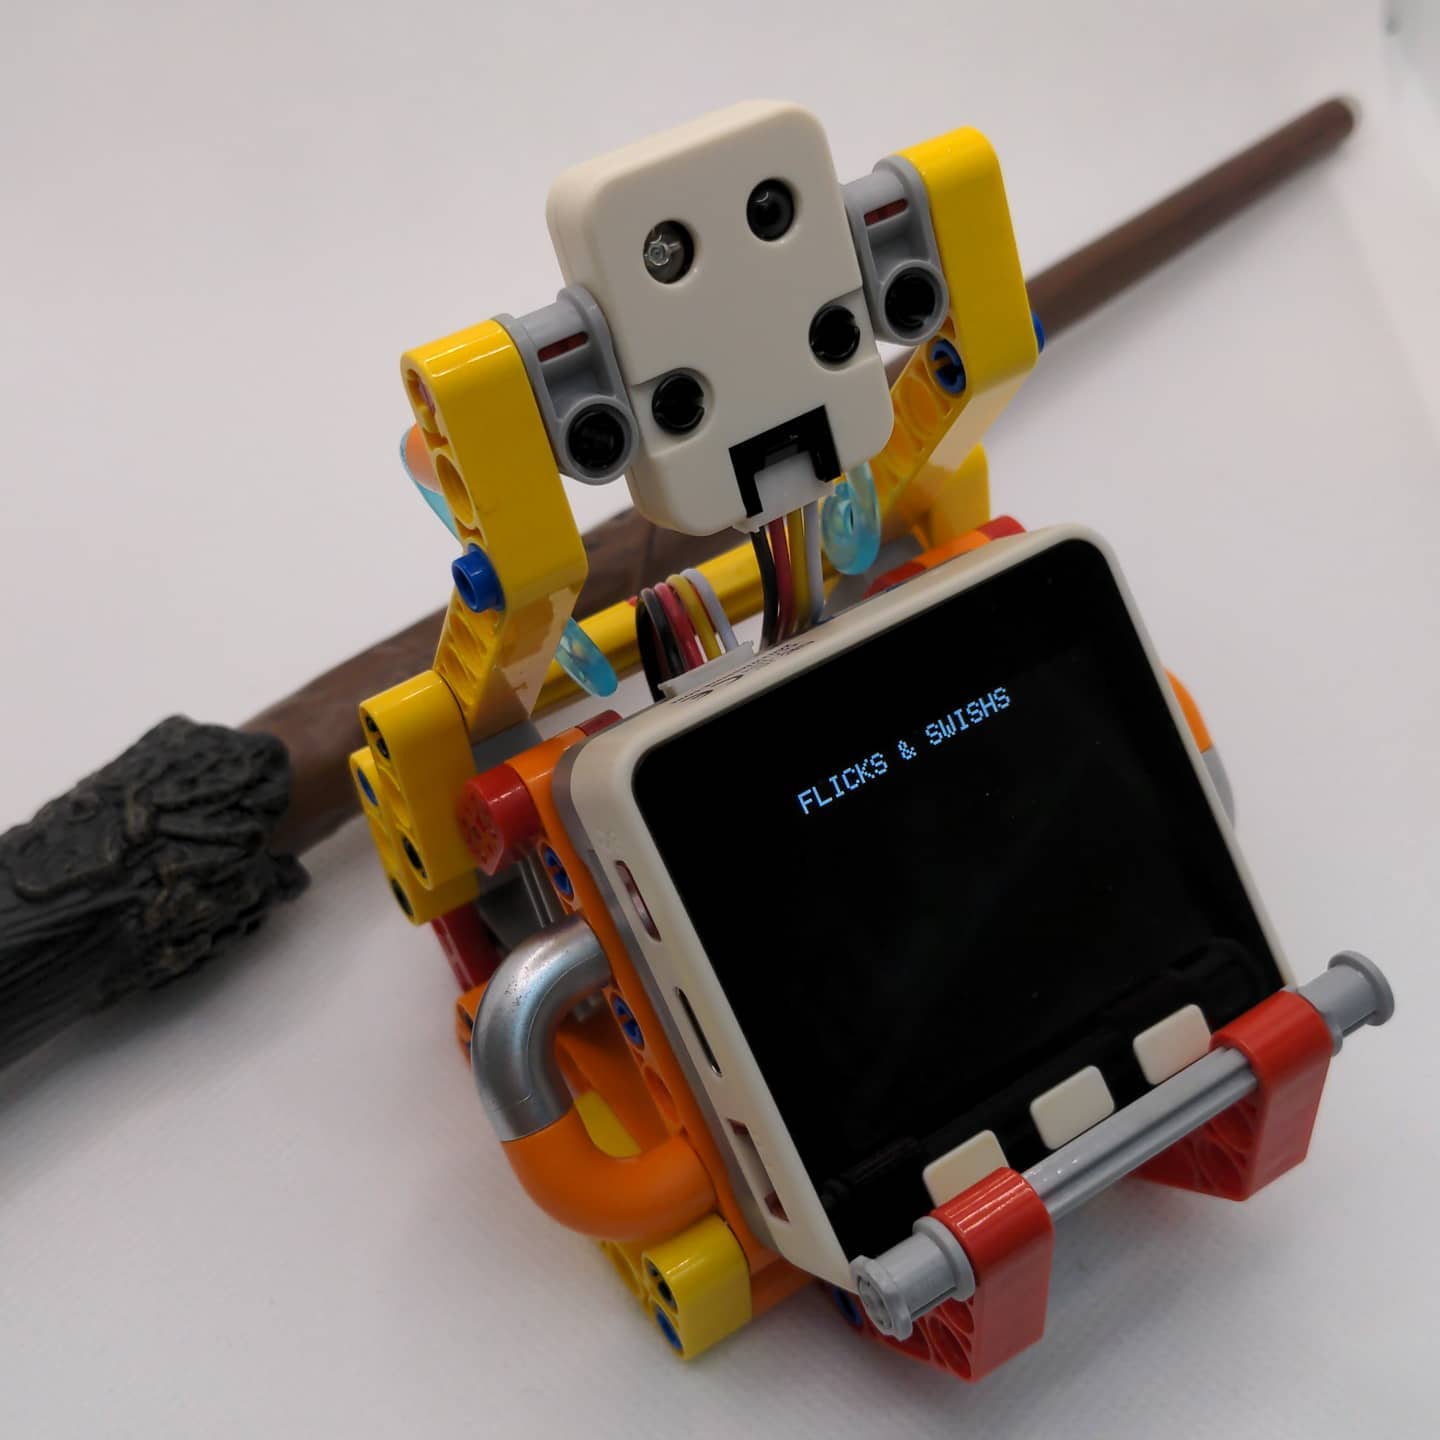
The artifact is the halt of the sword. When it is activated in VR, the galaxy blade will emerged on the virtual halt. The player can power up the blade with cosmic flares (or soul fire) for bigger attacks. I need to build a (bulky) halt that hosts both the touch controller, M5Stack, and the distance sensor unit. I gathered some 3D models from Thingverse including the Table Eleven paddle and a 3D scan of the left touch controller. I had to demesh the paddle before importing it to Tinkercad. I studied the paddle and decided to make my own. After some trial and error, I made a head piece that slide into the ring of the touch controller smoothly. I then built the whole halt from there.
I had a very vague image in my head of what the sword would look like. The alt controller is the artifact, a physical medium, that brings the virtual sword to the player. It has to be oversize, galaxy like, and burning with some sort of cosmic flares (or soul fire). After some tinkering in Unity, this is what I came up with:
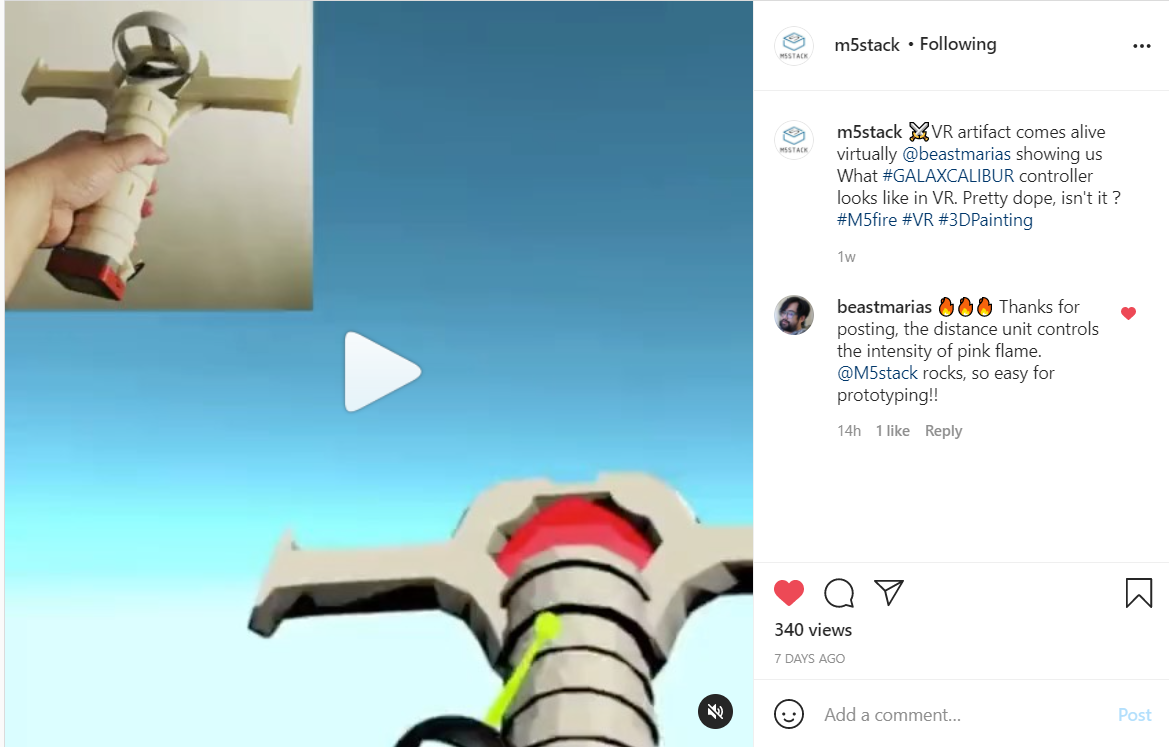
The player can ignite the soul fire by putting one’s hand right in front of the distance sensor unit after certain time and increase the fire coverage on the blade by moving one’s hand away from the sensor. The player will be given a quick hands-on tutorial when the soul fire is awaken in the play experience. Testing video on Instagram was pick up by M5Stack, what a lovely surprise!
When I was living near the school around 2008, there was a cute German couple living in the same building. They look like they are in their 70s. I often ran into them when they are doing their grocery shopping in the late afternoon. They talk very loud as if they were arguing but when they split to do different things they always give each other a kiss on the cheek. From our elevator conversations, I found out the husband was teaching photography at Parsons for many years, and they escaped to the US in 1950s as a result of wars in Europe. I have heard The New School helped many artists and designers escape and offered them shelters and jobs. I was very honor to meet two of them!
I sometime walked a few blocks with them just to hear more stories. One day, when the wife found out that I am making games, she let me know that she won her battle against cancer earlier because of video games. When she was sick, she had to go to hospital to have chemotherapies. It always felt awful both physically and mentally after the treatment. Luckily, she found out a store across her hospital had a few arcade cabinets. It has become a routine of hers to go right into the store and play arcade games after every hospital visit. She said those games make her happy and stop the awful feelings from spreading. When her cancer was cured, she had thought that the video games are the unsound heroes of her victory.
Antibody
Imagine a future where medical treatments can be executed remotely in the form of immersive video games.
This idea was inspired by my friend, Grace, a German grandma who lives in my apartment building. She is a proud cancer survivor and she has convinced me that playing Space Invader for 15 minutes after every hospital visit was the key to curing her cancer. I have read several similar stories like this one in which patients dreamed about fighting against monstrous enemies in a video game and woke up fully recovered from their illness. I am intrigued by the prospect of immersive technology transforming these miracles into a universally practical cure.
Antibody is my speculative scenario situated in a near future with advancement in neuroscience and nanotechnology. The medical facilities are capable of sending skilled gamers into infection zones as antibodies and helping white cells build up immunity. These gamers are equipped with various experimental nano-weapons that enable them to behave differently in the field. In this quick mission for beginners, a broadsword nano-weapon is available for action.
To enhance the level of immersion, a specialized controller is available for gamers to replace the standard controllers that come with their VR headset. These specialized controllers, a.k.a data relics, usually resemble the look and feel of the nano-weapons in the virtual world. They are capable of harvesting kinetic energy and associated data in the real world to aid the medical facilities in improving the technology and training better antibody agents. Experienced gamers customize their personal data relic to access advanced game mechanics. In this submission, the simulation is designed for a standard VR controller, no data relic is required.
As a playful experience designer, I believe video games may contribute more to the world without compromising the fun. This is my attempt at envisioning a post-pandemic future with virtual gaming for social good and I hope you enjoy it. PCVR and Standalone VR ONLY
Kyle Li is a playful experience designer working and living in New York City. Experimental by nature, his body of work wraps around playful experiences manifested by interconnected physical and digital components. He has done a wide range of works from concert stage visual to airline cockpit data visualization to the award-winning game-and-learning installations at middle-schools in both NYC and Chicago.
Stage 1: Spores Spores detects the player based on proximity.
Stage 2: Virus infected lukes Virus infected lukes behaves like zombie but they are curable. They will walk towards to the player and attack. The player has the ability to see the infected points on a luke’s body, breaks all the points on a luke with Galaxcalibur will cure it. Cured lukes will join the the group of lukes that is following the player.
Stage 2.5: Free imprisoned lukes The player points the Galaxcalibur at the lock to activate the unlock sequence. Follow the rotating sequence by rotating the sword.
Stage 3: Boss Fight No idea, it has to be huge, and lukes are going to help.
Alt Controller: Galaxcalibur M5Stack will collect “Energy” based on Galaxcalibur’s movement, which effects the pulse of the vibration. When energy reaches a threshold. The player can use a devastated attack and this activated by putting player’s hand in front of the ToF sensor.
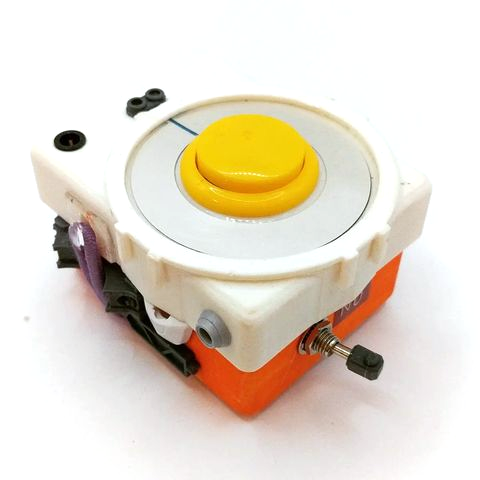
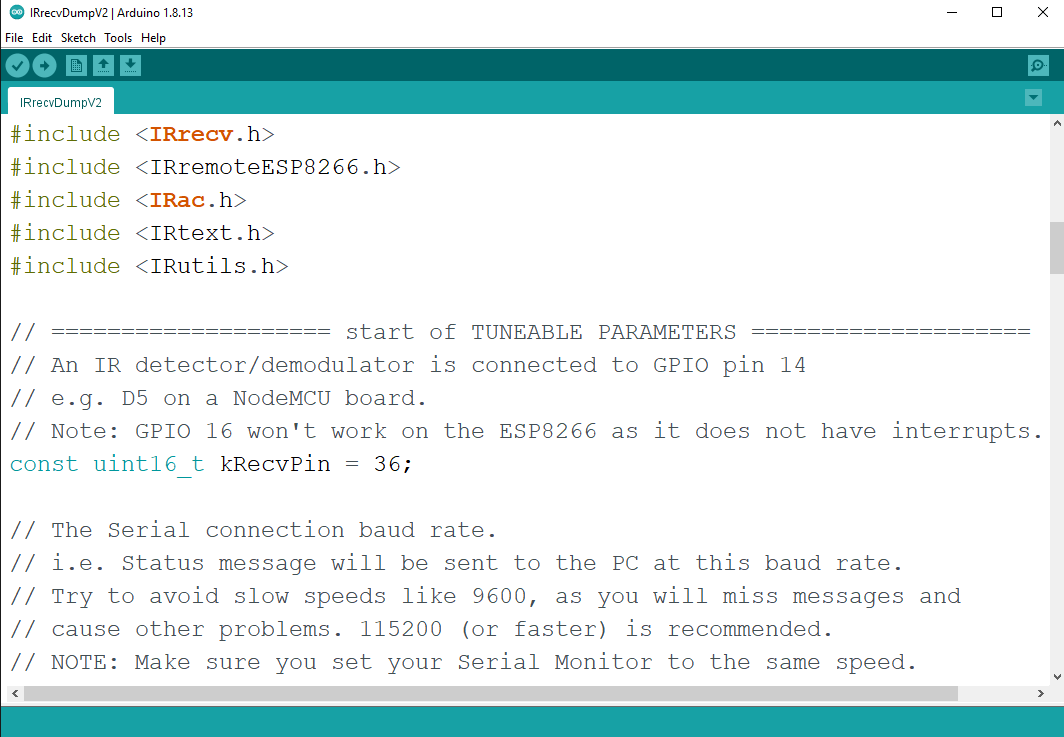
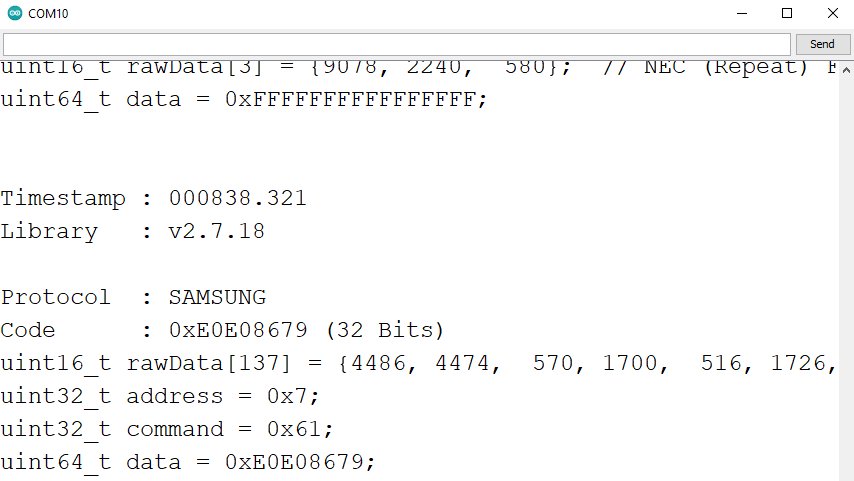
I had done a few projects in the past using IR remote as a way of wireless communication. I used FLIRC USB (https://flirc.tv/more/flirc-usb). It is essentially a USB IR receiver that plugs into your computer and turns IR signals into specific keystrokes. The great thing about FLIRC is that once you configured it on a computer with its application, you can use it anywhere with a USB port. The only downside is that the FLIRC USB only offers six customizable inputs (up, down, left, right, enter, and back) because it is meant to be used for media playback. I just figured out a way to do it with M5Stack and the IR Unit now.
I am using the M5Stack Core + IR Unit (Port B), so have to change the pin to 36.
Upload it to M5Stack, get the readout (Code) from the serial monitor. Since I don’t need to recreate the IR signal, the Code here will work just fine.
Now, M5Stack can read the remote and react!
In order to work with result.value, I need a uint64_t to String helper method to make the comparison easier for me.
String u64ToS(uint64_t input) {
  String result = "";
  uint8_t base = 10;
  do {
    char c = input % base;
    input /= base;
    if (c < 10)
      c +='0';
    else
      c += 'A' - 10;
    result = c + result;
  } while (input);
  return result;
}
or
String print64(uint64_t n) {
   char buf[21];
   char *str = &buf[sizeof(buf) - 1];
   String sdata = "";
   *str = '\0';
   do {
     uint64_t m = n;
     n /= 10;
     *--str = m - 10 * n + '0';
   } while (n);
   sdata += str;
   return sdata;
 }
The USB HID (Human Interface Device) specification allows us to build plug-and-play alternative controllers for a variety of devices without the need to install additional drivers. In this test, M5Stack Go is disguised as a normal HID Keyboard. Instead of serial communication, M5Stack GO will process the sensor data locally and send a correspondent keystroke defined by the designer. Keystrokes are like digital switches, so HID Keyboard can’t send over analog data.
Tested and worked with STYLY in Unity, on the Web, in AR (Mobile), in Oculus Quest (standalone), and on PCVR (Oculus Link or Air Link).
PCVR and WEB TEST SCENE Connect the controller to your computer, go to the following page and add it to your list. PCVR users find the scene in My List in STYLY app. Web users can just open it in the browser. https://gallery.styly.cc/scene/871fdff9-475c-4224-af41-9e8afba32922
Quest (Portable) Connect the controller to your headset, go to the link above and add it to your list. You can find it in My List in your STYLY app.
AR TEST SCENE Connect the controller to your mobile phone and scan the QR code with the STYLY app.
Advanced Topic: Would it be possible to read bleKeyboard.print() all at once as a string. If so, I can send over analog data as a string without having to scale it down to letters.
The biggest difference with HID Gamepad is the ability to send over joystick information. A joystick is made of 2 axes (usually 10K potentiometers), so with left and right joysticks and the two shoulder buttons, HID Gamepad is capable of communicating 6 analog data over in the format of axes by default. It’s worth mentioning that HID mouse is also capable of communicating over 1 analog value over its scroll wheel.
Combine IndividualAxes and PotAsAxis example in ESP32-BLE-Gamepad and JOYSTICK example in M5Stack/Units.
After some initial testing, the old input system in Unity editor can’t recognize the ESP32 BLE Gamepad. When connected through Bluetooth, it doesn’t show up as a gamepad as the TEST 3 did. The new input system recognizes it but the action needed to access the inputs is a custom one which is not included in Playmaker’s standard actions.
This test is based on a custom library put together by Shigeru Kobayashi. This library allows the ESP32 gamepad to be discovered by both old and new input systems in Unity 3D as the default Axes X and Y and buttons 0 to button 4.
Set network parameter and your account information in network_param.h.
Say to the microphone and see the serial monitor.
Test this in the command prompt (Windows 10): curl -s -X POST -H "Content-Type: application/json" -d @request.json "https://speech.googleapis.com/v1/speech:recognize?key= API_KEY"
Make sure the request.json file is in the same directory in which the curl command is executed.
In order to get this sketch to run on M5Stack, I have to set up OPENSSL on my Windows 10. Here is a recent tutorial: https://tecadmin.net/install-openssl-on-windows/ One confusing thing in this tutorial is the directory name. I downloaded the Winx64 version as instructed, so my directory should be C:\OpenSSL-Win64 not C:\OpenSSL-Win32 as shown in the tutorial. The environmental variables should be like this:
set OPENSSL_CONF=C:\OpenSSL-Win64\bin\openssl.cfg
set Path=......Other Values here......;C:\OpenSSL-Win64\bin
Don’t forget to restart the computer afterward.
After generating the certificate with OpenSSL in the command prompt, copy and replace the value of root_ca. Make sure to keep the same exact format.
One last thing that caused an error callback for me was the name of a property in the HttpBody1 was wrong. It should be “sampleRateHertz\” not “sampleRate\”. While I was there, I also changed “languageCode\”:\”ja-JP\” to “languageCode\”:\”en-US\”.
I was able to get it to work after all these changes. I said “Hello Hello” and this came back in the Serial Monitor, pretty satisfying!
I realized the client.read() returns more than just the JSON data, there is a huge header too. After some research online, didn’t find anything useful on how to get rid of the header, so I went for the old-school way -> remove(); After cleaning up extra strings both before and after the data, it works beautifully with the ArduinoJSON library.
Helps to calculate the size of the data and also shows how to access specific data in the JSON tree. I was having problems understanding the examples in the library but this tool did it for me : https://arduinojson.org/v6/assistant/
To get this code to work, I made a total of 48 requests to the Google Cloud Platform and used 2.75 minutes. I think as an indie experimentalist, 60 minutes/month for free is a really good deal.